


What is Splash Screen?
Splash Screen (or Launch Screen on iOS) is the very first page of your app seen by users. So it would be great to make a good first impression. I would like to present you a few ways to create a splash screen in your Flutter application using native solutions or Flutter package. Our goal is to create splash screens as shown below (from left: iOS 15, Android 12, Android 8):

iOS
Launch Screen using Storyboard
We are able to set a splash screen for iOS in two ways. The first one is by using Storyboard.
- First of all, we need to open our project in Xcode. Being in the main directory of the project, we can do that using
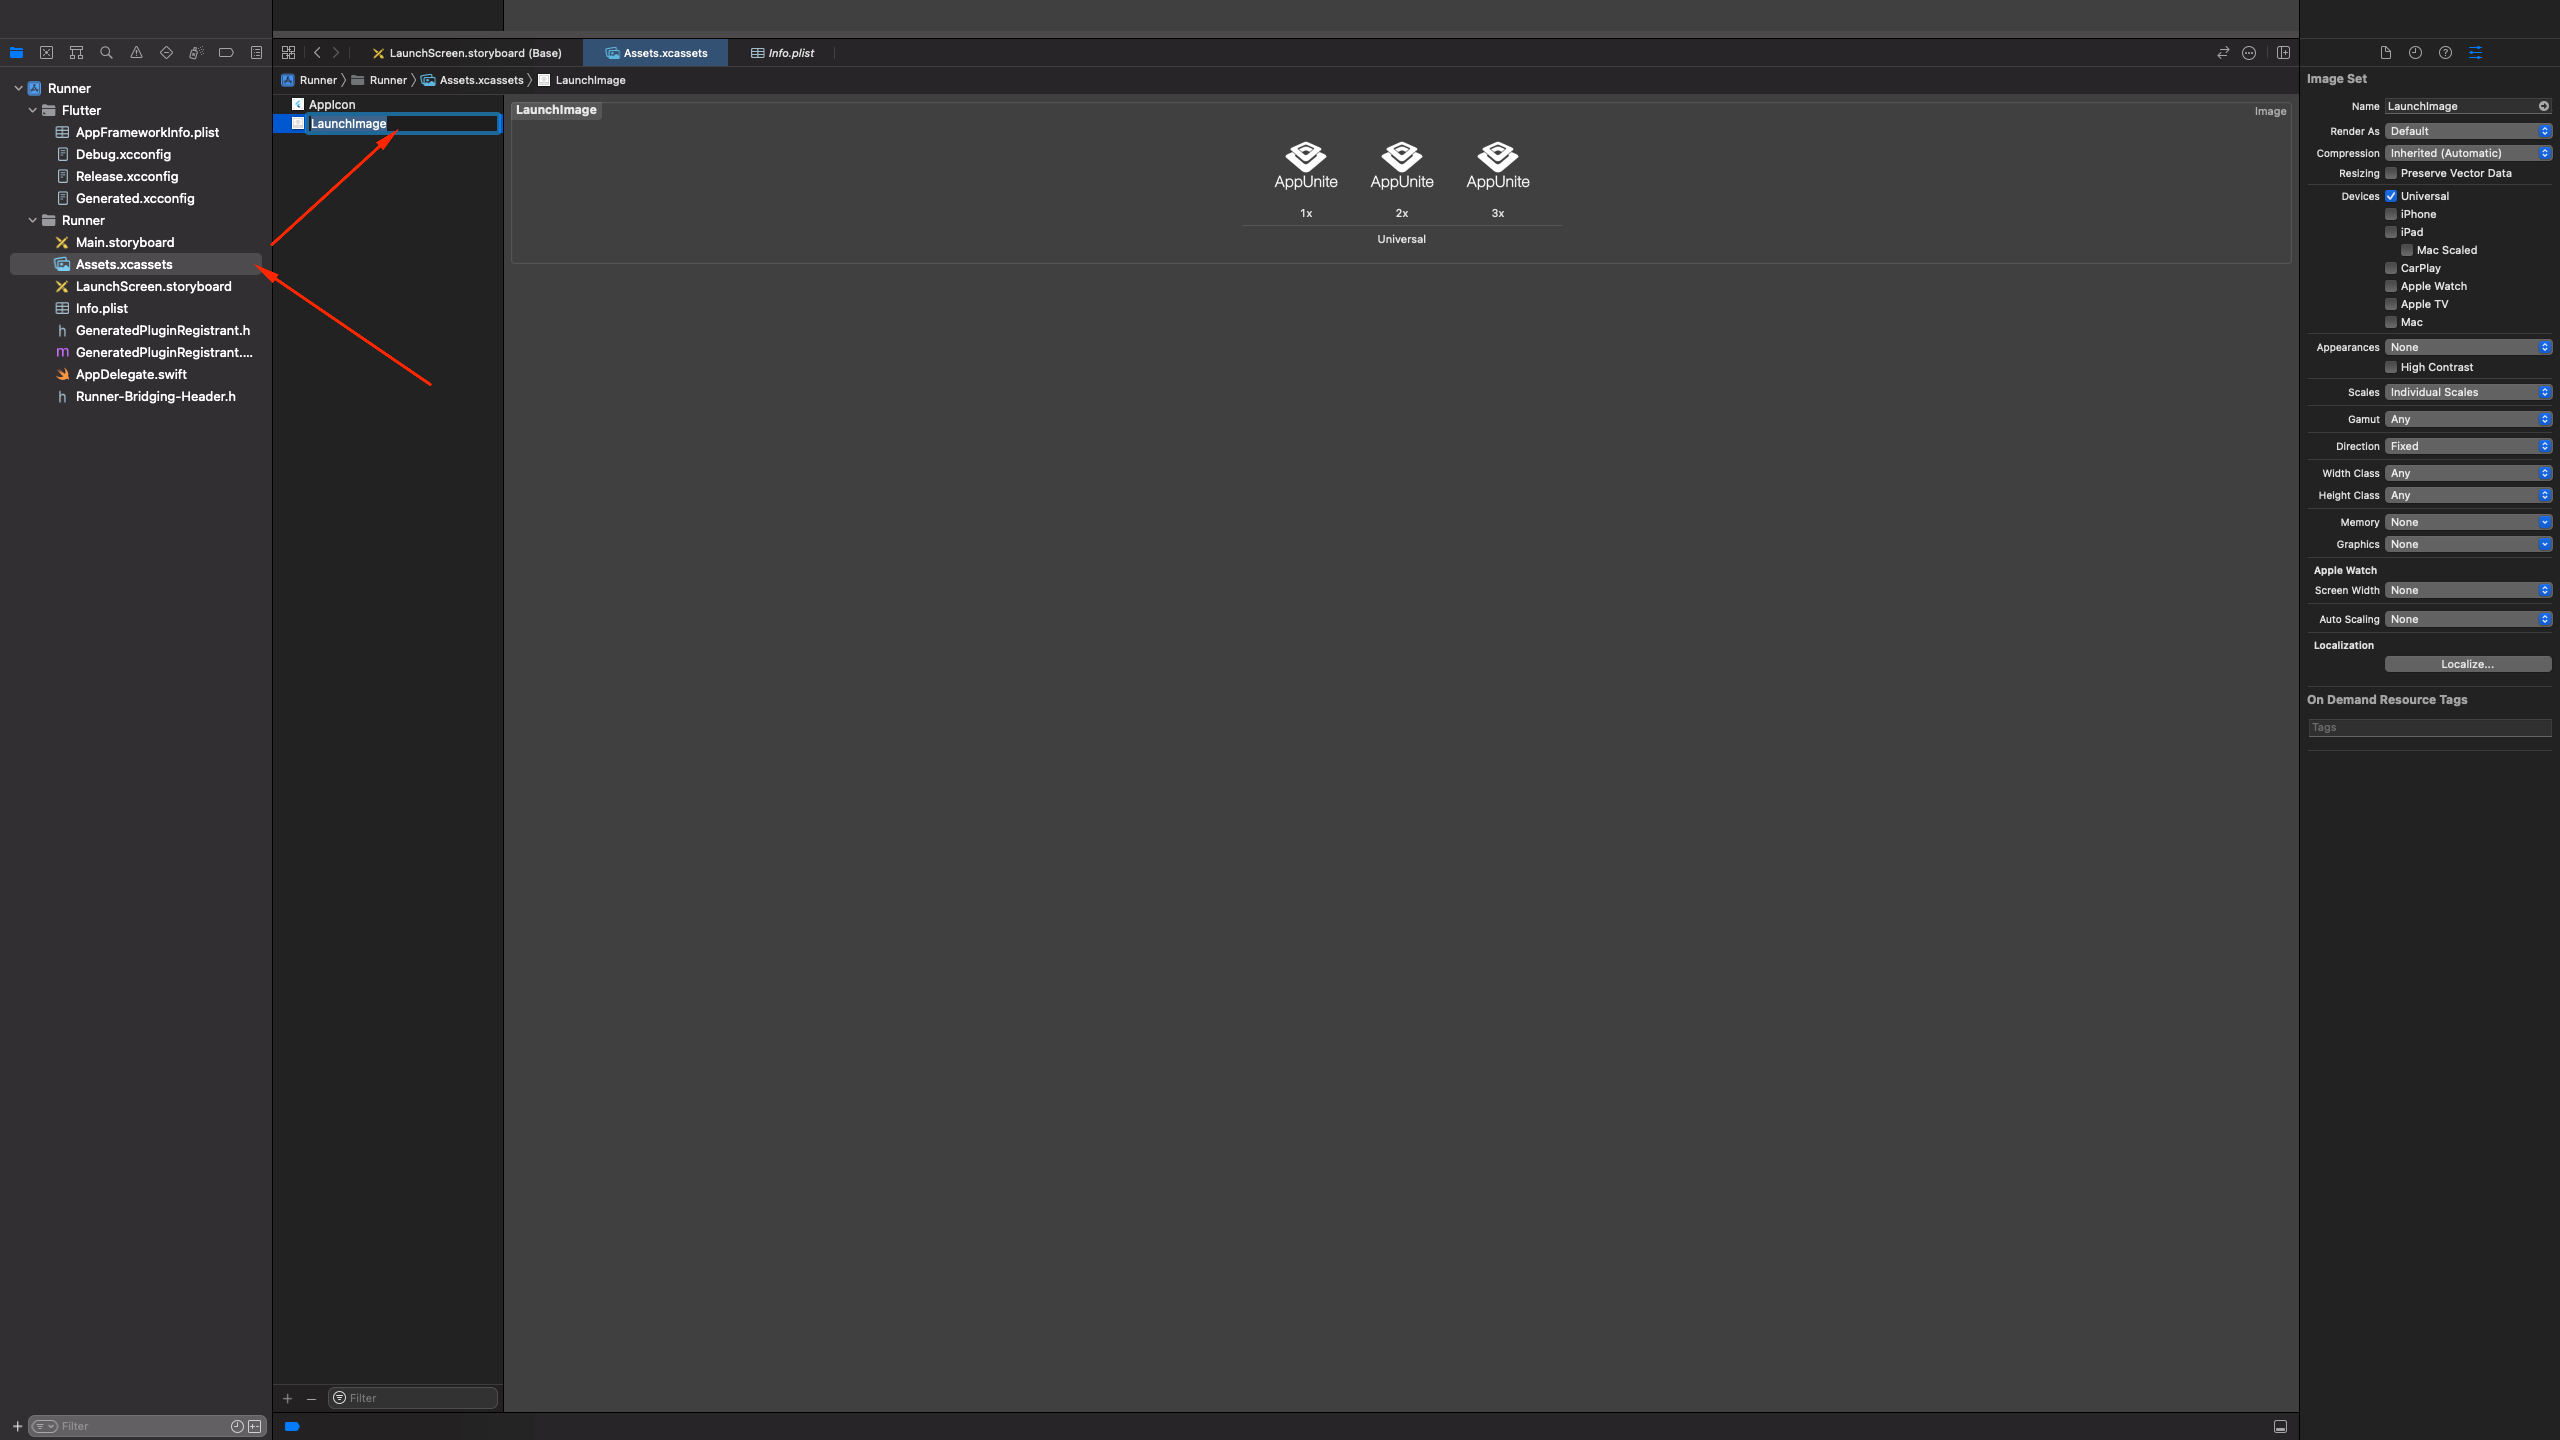
open ios/Runner.xcworkspacecommand. - Then, we need to add AssetImage, which is going to be our icon on the splash screen. As you can see in the image below, we need to provide 3 different resolutions of an icon: 1x, 2x and 3x (more details here)
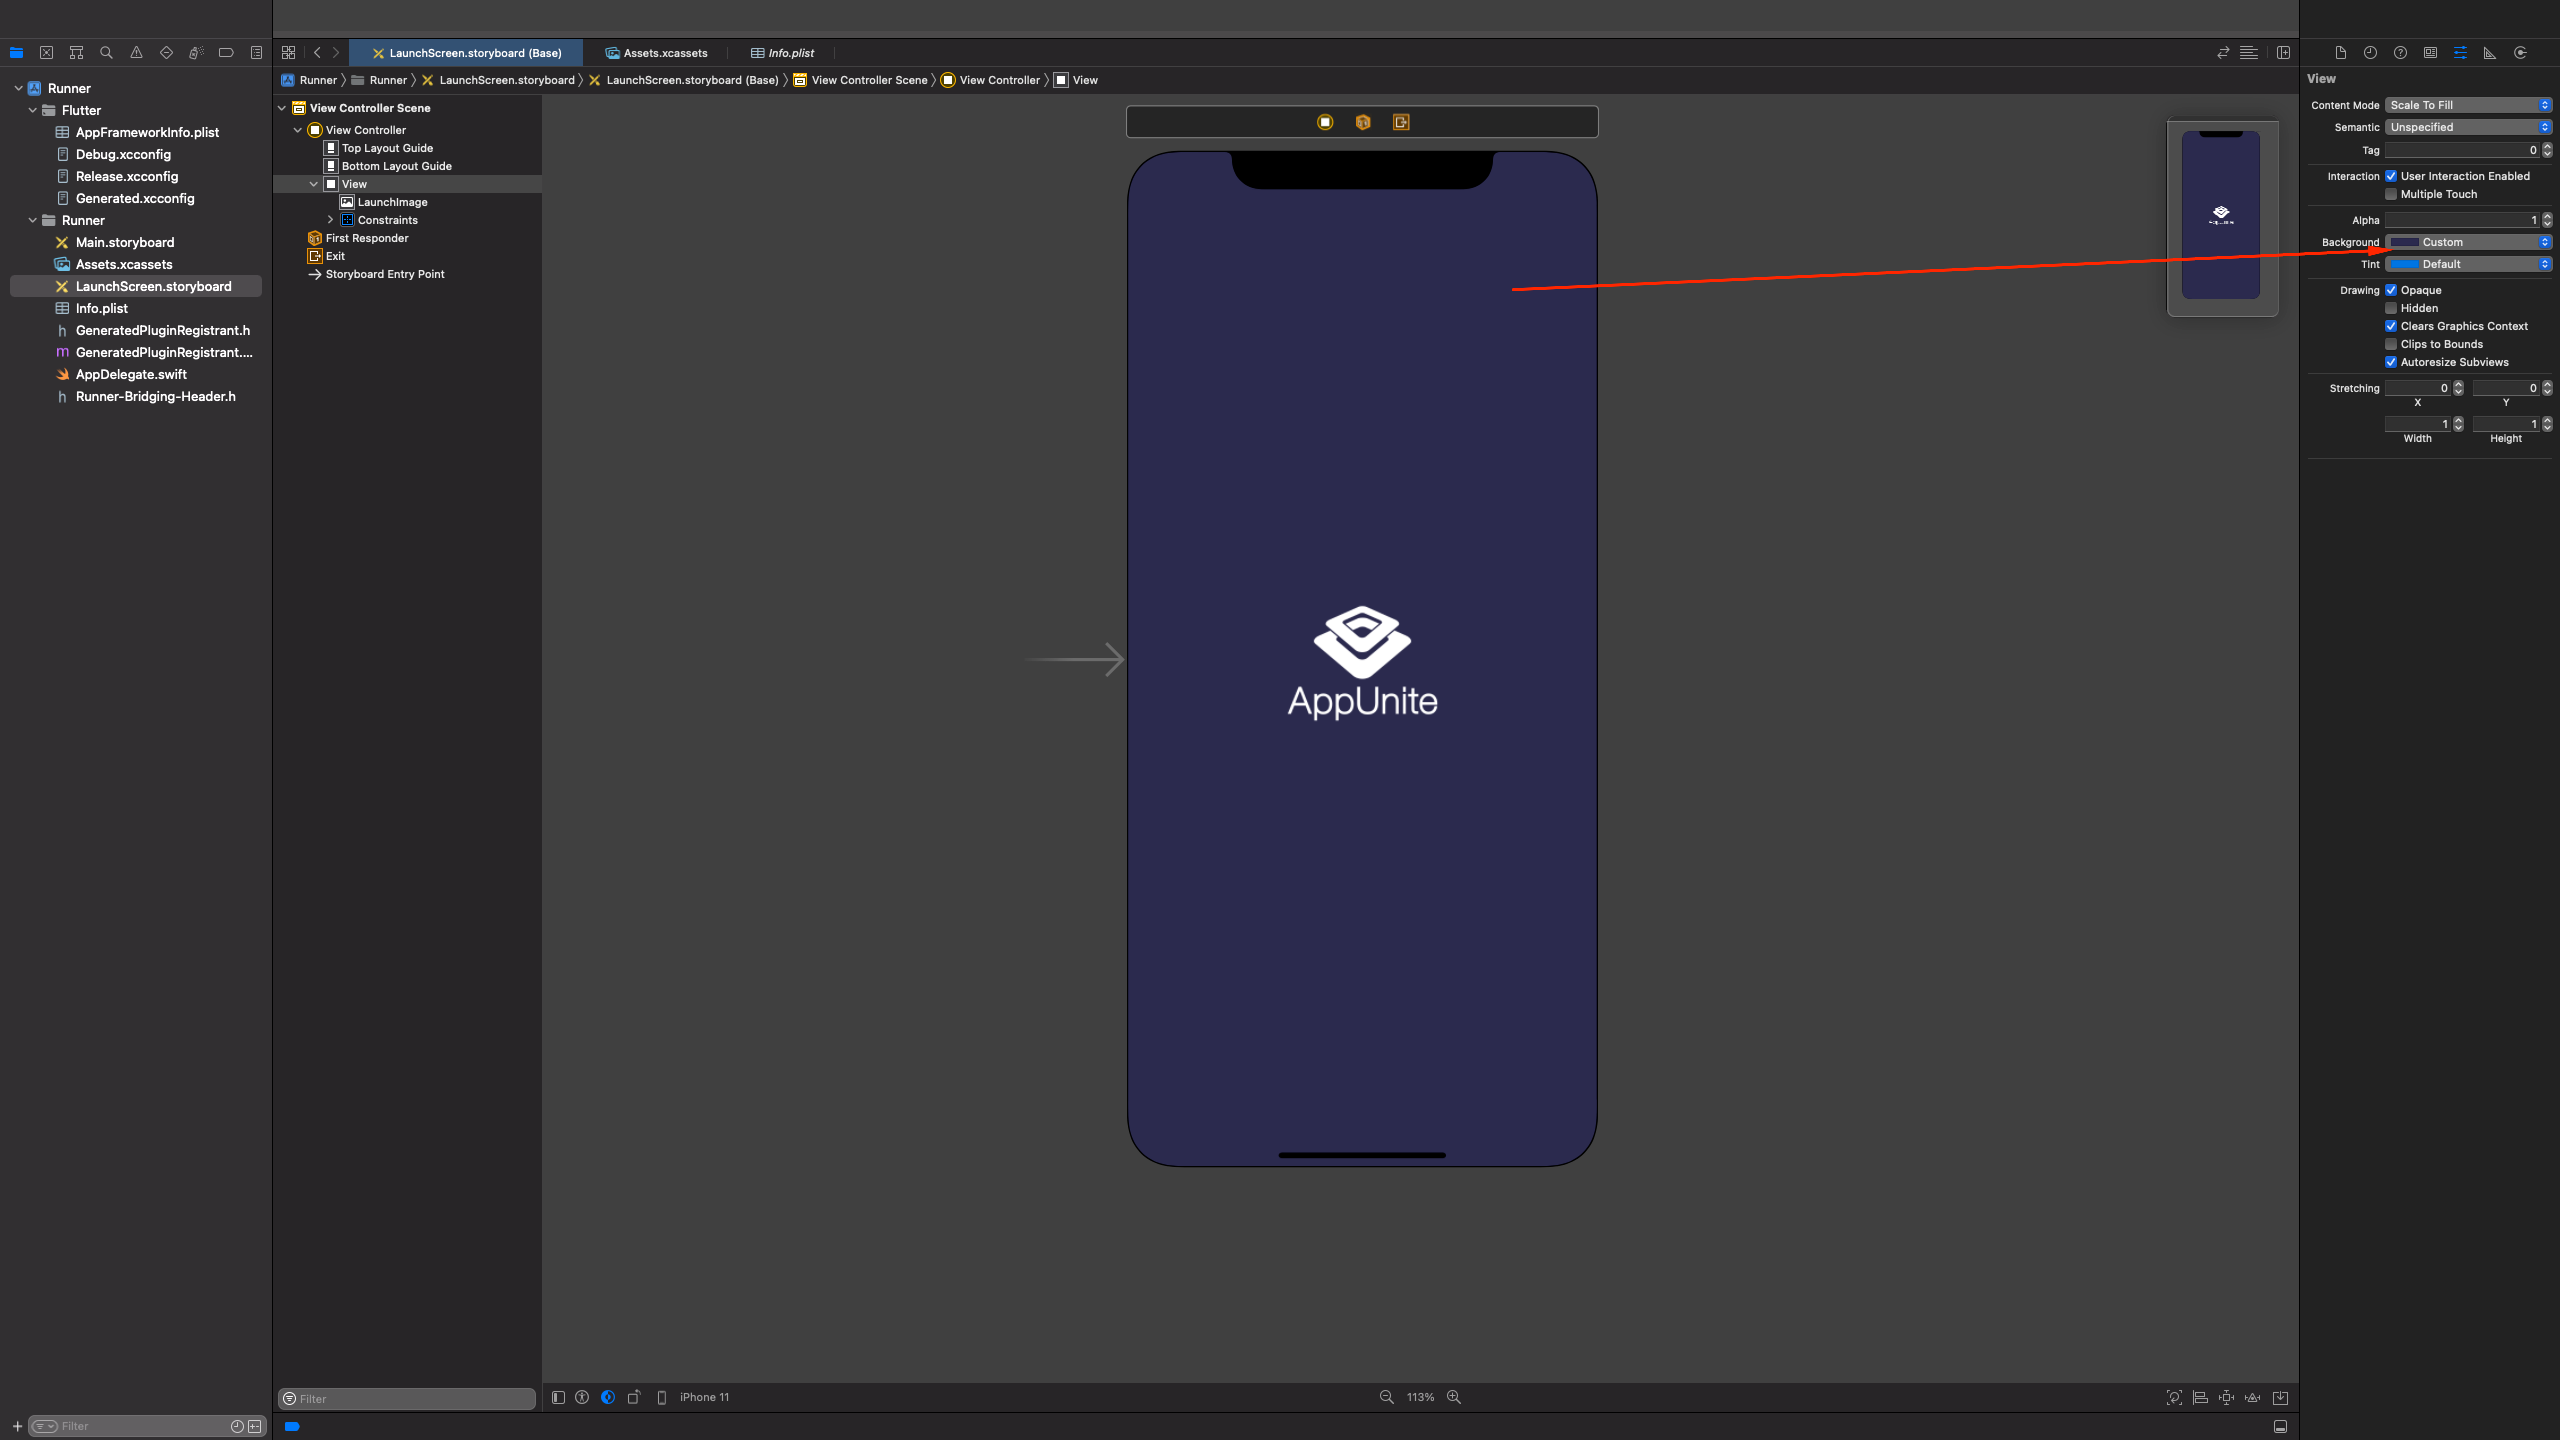
- Then, we need to set a background color in LaunchScreen.storyboard as in the image below.
- That is all. Our splash screen should appear after building the app.
TIP 1: If you can’t see changes to your splash screen, try to delete the app from the phone/simulator, restart the phone/simulator, go to Xcode→Product→Clean Build Folder. That should solve the issue.
Launch Screen using Info.plist
The second approach uses Info.plist file (Information Property List).
- Remove LaunchScreen.storyboard file using Xcode (it is important to use Xcode to remove all dependencies to that file).

- Then, add New Color Set inside Assets.xcassets. We are able to define different colors for light and dark themes.
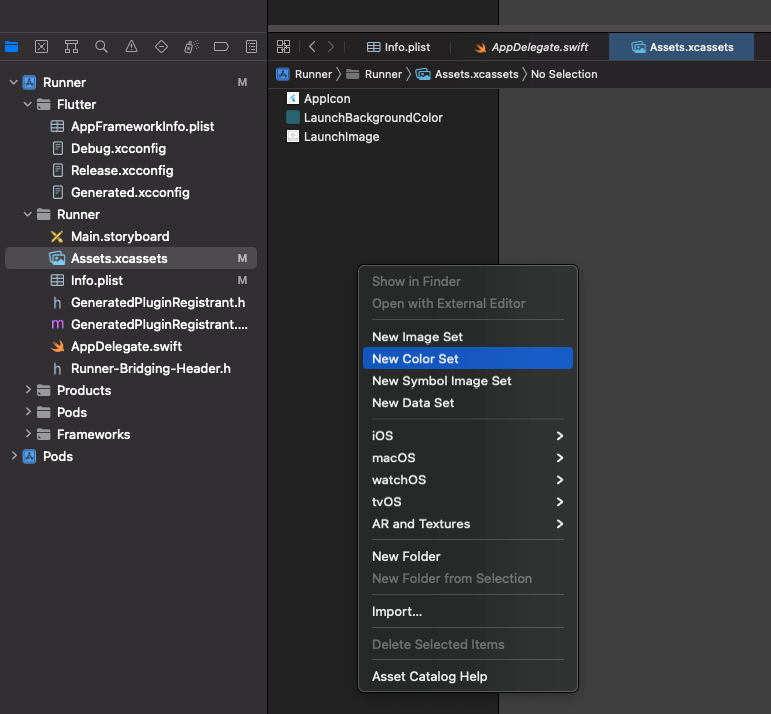

- Add AssetImage as in the 2nd step for Storyboard.
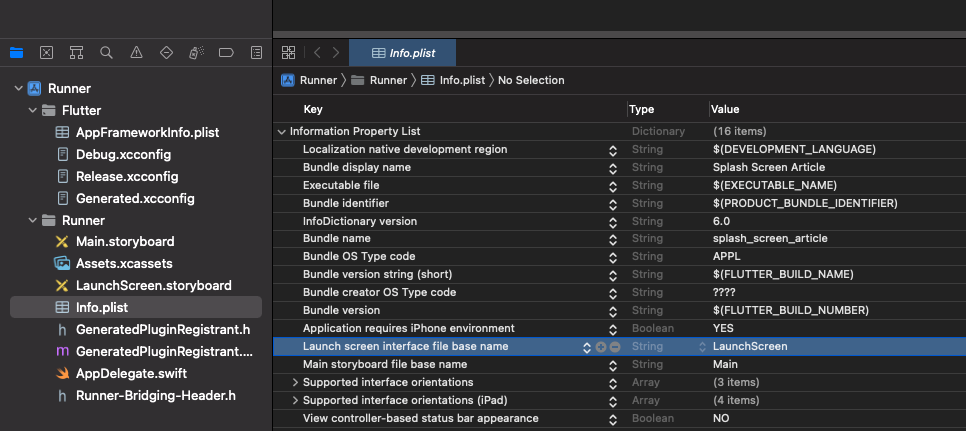
- Next, we have to remove information about using the storyboard as our splash screen in Info.plist file. To do that, delete the “Launch screen interface file base name” key.
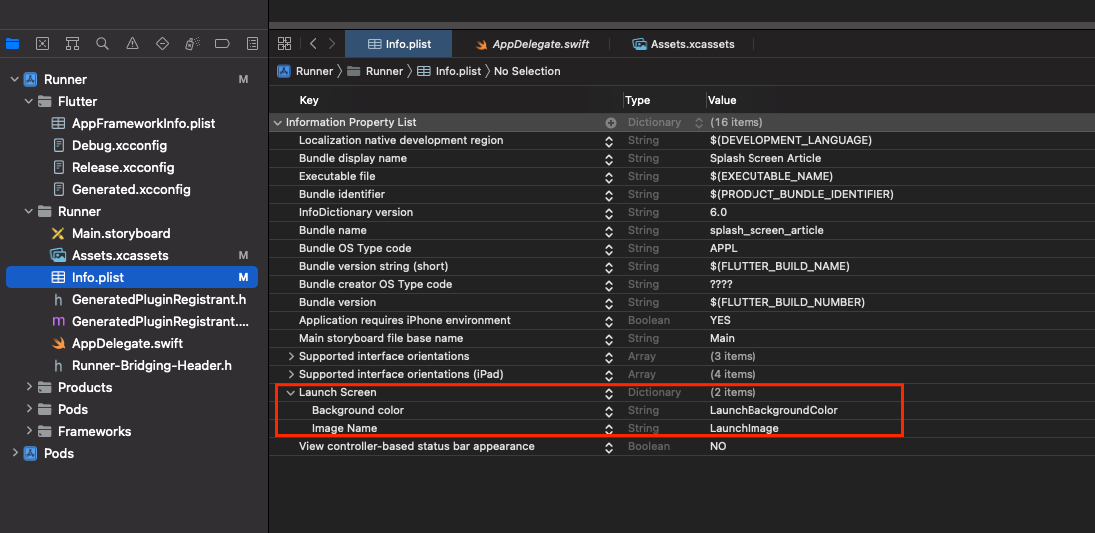
- And then set the appearance of our new splash screen using “Launch Screen” key. “LaunchBackgroundColor” and “LaunchImage” are assets added in a previous steps.
- Done. Run the app… and, unfortunately, we can notice a black screen between our beautiful splash screen and the first page of the app.
Android Splash Screen
For Android, we also need our icon image in different resolutions for different devices. In this case, place these images in directories called drawable with different suffixes. If you are not familiar with drawables, I highly recommend reading that article explaining the topic in detail.
To generate all required resolutions of images, I have used the website https://www.img-bak.in/ (but this one is also cool http://romannurik.github.io/AndroidAssetStudio/index.html). Remember to provide high-resolution image as an input, e.g. if you want to use an image of 200x200 pixels in your app, you should provide an image of 800x800 pixels because that is the highest resolution used by some Android devices (drawable-xxxhdpi).
- After generating all required images, place them in appropriate directories in
Android/app/src/main/res. - Then, we need to modify the
Android/app/src/main/res/drawable/launch_background.xmlfile. This file will represent the look of our splash screen. If you also have adrawable-v21directory present, which in my case, was generated together with the whole project, you can remove the mentioned directory or place there the samelaunch_background.xmlfile as in thedrawabledirectory. - Next, we have to set our
launch_background.xmlas a splash screen. To do that, openAndroid/app/src/main/res/values/styles.xmland underLaunchThemeresource setandroid:windowBackgroundas in the snippet below.
If you want to have a different splash screen in dark mode/theme, you have to provide a different file e.g.launch_background_dark.xml in values-night/styles.xml.
TIP 2: If you can’t see an icon on your splash screen after building the app, just close the app and open it directly from the device.
Now, if we launch the app on Android 11 or lower, we will see our splash screen, however, on Android 12 and higher, it won’t work in the same way. Android 12 brings some big changes to splash screens. The two most important changes are:
- the background color must be a single solid color (previously we were able to set any image as a background);
- the icon must have specific dimensions and be placed in the center of the screen.
More information on that here.
Android 12
Ok, so let’s modify our splash screen for Android 12.
- Add a new directory named
values-v31.v31means that this directory will be used instead of the sheervaluesdirectory for all Android devices with SDK 31 and higher. Then, place herestyles.xmlfile presented below. Most of the code looks identical to the previous one. - As I have mentioned earlier, an icon for Android 12 must have some specific dimensions. That is why we use here an image named
android12splashinstead oflogo(which was used earlier inlaunch_background.xmlfile as our icon.)
As documentation says:
- App icon with an icon background: This should be 240×240 dp, and fit within a circle of 160 dp in diameter.
- App icon without an icon background: This should be 288×288 dp, and fit within a circle of 192 dp in diameter.
To generate all required icons, we can use one of the online tools presented earlier.
For example, first - an icon with wrong dimensions:
and second - with proper ones:
Flutter Splash Screen
flutter_native_splash is a fast way to create a splash screen for both iOS and Android apps. It has some limitations, but in most cases, it is sufficient.
- First, we need to add a package to the
pubspec.yamlfile underdev_dependencies(or underdependenciessometimes 😉`). I am using version 2.1.0.
Most important lines:
- Line 14 - setting the color of a background. As you can see in the next line, we are also able to set a background image instead of a single color.
- Line 22 - setting an icon.
- Line 53 - setting an icon for Android 12 and higher.
- There is also an option to set different colors and icons depending on dark/light mode/theme and much more, which is well documented and easy to understand.
- Then, set the appearance of our splash screen using the
flutter_native_splash.yamlfile. - The last step is to run command
flutter pub run flutter_native_splash:create --path=flutter_native_splash.yaml. And that is all!
One more thing to explain, what is the reason to place the flutter_native_splash package under dependencies? With the version 2.0.3+1 the package allows us to select the time when the splash screen should disappear. So now we are able to initialize everything we need to start the app and then show our first screen. Previously, when the app was ready to render the first frame of the app, the native splash screen (so that one we were creating) disappeared and there was a need to create a special page being our splash screen until the whole app was initialized.
So to keep displaying the native splash screen, we need to write two simple lines of code 7-8:
After that, the splash screen will be visible until we call FlutterNativeSplash.remove();.
What is under the hood?
Let’s check what changes the flutter_native_splash package makes to our project after running the generate command.
iOS changes
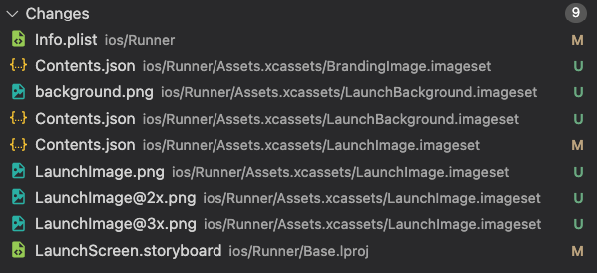
Info.plist - setting a flag to hide status bar during splash screen.

ios/Runner/Assets.xcassets/BrandingImage.imageset/* - directory for setting branding image at the bottom of the splash screen. We didn’t set that in our config file flutter_native_splash.yaml, but it was generated anyway. So we can remove that whole directory BrandingImage.imageset.
ios/Runner/Assets.xcassets/BackgroundImage.imageset/background.image - this package uses a storyboard to set a splash screen for iOS. In storyboard, it sets background as an image. So firstly, the package generates an asset image (1x1 pixel) which represents a background color and then sets it as a background image.
ios/Runner/Assets.xcassets/LaunchImage.imageset/* - directory for icon (“logo.png”) automatically generated in different resolutions.
ios/Runner/Base.lproj/LaunchScreen.storyboard - as I have mentioned earlier, the package uses storyboard in which icon and background color is being set.
Android changes
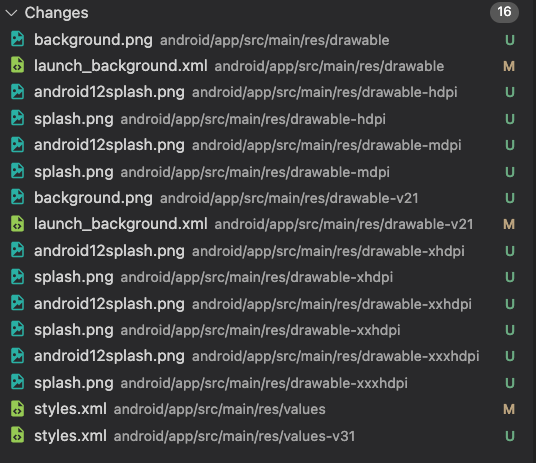
All files named android12splash.png are generated images for different devices with Android 12 and higher placed in appropriate drawable directories.
All files named logo.png are generated images for different devices with Android 11 and lower placed in appropriate drawable directories.
background.png - image 1x1 pixel which represents a background color. This file is later used in the launch_background.xml file to set the background.
launch_background.xml - the same file we have been modifying earlier, when setting the splash screen without a package, but with some changes.
In drawable and drawable-v21 directories, we have exactly the same files, so we can remove the latter one if we want.
android/app/src/main/res/values/styles.xml - again, the same file we have been modifying earlier with some differences i.e. added two flags forceDarkAllowed and windowFullscreen.
So as you can see, there is no magic. flutter_native_splash Package does everything that we can do ourselves, but faster 😊.


